Getting Started
Quick Started
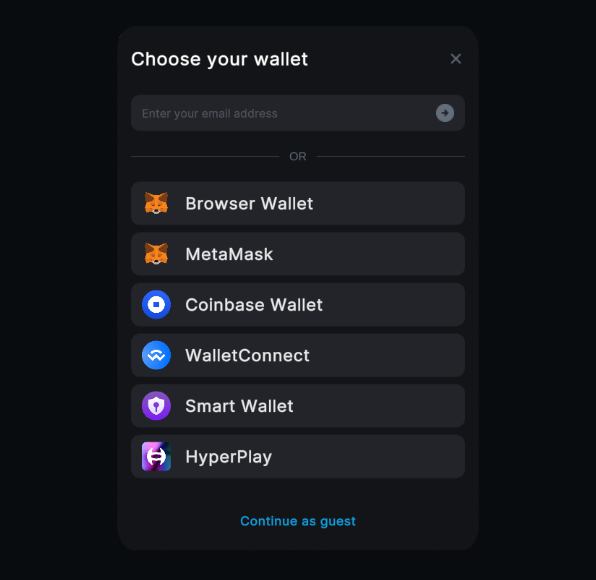
The quickest way to get started is to use the interactive Connect Wallet component builder.
This playground allows you to modify the theme, size, and supported wallets of the Connect Wallet component and preview the changes in real time.
You can then copy the code snippet and add it directly to your app.
For details on how to use the Connect Wallet component in an app and set up a project, read the guide below and use your generated code snippet for the ConnectWallet component.
Guide
- React
- React Native
- Unity
To get started, install the required dependencies into your React project.
- Existing Projects
- New Projects
Additional Configuration
Create React App
Add below packages as dependencies in your package.json
{
  ...
  "dependencies": {
    ...
    "url": "latest",
    "http": "npm:http-browserify",
    "https": "npm:https-browserify",
    "zlib": "npm:browserify-zlib",
    "http-browserify": "latest",
    "https-browserify": "latest",
    "browserify-zlib": "latest",
    "assert": "^2.0.0",
    "stream": "^0.0.2"
  }
}
Install them from NPM using the following command
- npm
- yarn
- pnpm
To ignore the sourcemap warnings, create a .env file with the following in your root directory:
GENERATE_SOURCEMAP=false
Vite
Install the vite plugins
- npm
- yarn
- pnpm
In the vite.config.js file, add the following configuration:
import react from "@vitejs/plugin-react";
import { defineConfig } from "vite";
import { nodePolyfills } from "vite-plugin-node-polyfills";

// https://vitejs.dev/config/
export default defineConfig({
  plugins: [react(), nodePolyfills()],
  define: {
    "process.env": {},
  },
});
Next.js
Pages Router
No additional configuration is required if you are using the pages router
App Router
If you are using the new app router, and If you import a component such as ThirdwebProvider in a server component, Next.js will throw an error saying that the component is not marked with "use client" directive.
You will need to create an alias for that component in a separate file with "use client" directive on top (before all the imports) and import that instead of using the component directly from @thirdweb-dev/react in server components.
Example
"use client";

export { ThirdwebProvider } from "@thirdweb-dev/react";

// app/components/ThirdwebProvider.tsx
import { ThirdwebProvider } from "./components/ThirdwebProvider";

export default function Home() {
  return <ThirdwebProvider> ... </ThirdwebProvider>;
}

// app/page.tsx
You will require an API key to use thirdweb's infrastructure services with the SDK. If you haven't created a key yet you can do so for free from the thirdweb dashboard.
Wrap your application in ThirdwebProvider
Wrap your application in the ThirdwebProvider component to start using the SDK.
import { ThirdwebProvider } from "@thirdweb-dev/react";

const App = () => {
  return (
    <ThirdwebProvider activeChain="ethereum" clientId="your-client-id">
      <YourApp />
    </ThirdwebProvider>
  );
};
Examples of where to set this up: Create React App • Next.js • Vite
With the provider set up, all of the SDK’s hooks and components work out of the box!
Now you can connect to the user’s wallet like so:
import { ConnectWallet } from "@thirdweb-dev/react";

const Home = () => {
  return <ConnectWallet />;
};
npx thirdweb install
This will detect your project type and install the thirdweb React Native SDK.
Our SDK uses a Provider Pattern; meaning any component within the ThirdwebProvider will have access to the SDK.
Let's take a look at a typical setup:
You will require an API key to use thirdweb's infrastructure services with the SDK. If you haven't created a key yet you can do so for free from the thirdweb dashboard.
Configure the ThirdwebProvider
Specify the network in the activeChain prop and specify the wallets to display in the Connect Wallet button by specifying an array to the ThirdwebProvider and wrap your application like so:
import {
  ThirdwebProvider,
  metamaskWallet,
  trustWallet,
  coinbaseWallet,
} from "@thirdweb-dev/react-native";

// provide supported wallets to ThirdwebProvider

function MyApp() {
  return (
    <ThirdwebProvider
      supportedWallets={[metamaskWallet(), trustWallet(), coinbaseWallet()]}
      clientId="your-client-id"
    >
      <App />
    </ThirdwebProvider>
  );
}
Below is an example of where to set this up in your application:
Finally, we can run our app!
yarn android
yarn ios
Using Connect Wallet
import React from "react";
import { SafeAreaView } from "react-native";

import { ConnectWallet } from "@thirdweb-dev/react-native";

const AppInner = () => {
  return (
    <SafeAreaView style={styles.backgroundStyle}>
      <ConnectWallet />
    </SafeAreaView>
  );
};
It uses the ThirdwebManager to determine which networks to display as well as the secondary UI related to certain providers such as WalletConnect.
You can set up which wallets you want to support from the Prefab_ConnectWallet Inspector directly.
When a user clicks the button, a dropdown of supported wallets will appear. The user can then select their preferred wallet to connect to the game; once connected, the button will show the user’s balance and an option to switch networks if multiple networks are set up through the ThirdwebManager.
The prefab is located at: Assets/Thirdweb/Examples/Prefabs/Prefab_ConnectWallet.prefab.

Configuration
From the Inspector window, you can configure the options for the ConnectWallet prefab.
Supported Wallets
The list of wallets you want to support. Each wallet you provide appears as a button in the dropdown.
Supports Injected (window.ethereum), MetaMask, Coinbase, WalletConnect, MagicLink, LocalWallet, Paper, SmartWallet, HyperPlay.
Some wallet providers may not be supported on some native platforms.
Custom Callbacks
Custom logic to run whenever an event occurs on the button, including:
OnConnected: Triggered when the user connects their wallet successfully.OnDisconnected: Triggered when the user disconnects their wallet successfully.OnSwitchNetwork: Triggered when the user switches networks successfully.OnFailedConnect: Triggered when the user fails to connect their wallet.OnFailedDisconnect: Triggered when an error occurs after attempting to disconnect a wallet.OnFailedSwitchNetwork: Triggered when an error occurs after attempting to switch networks.
